Published on: March 3, 2025
8 min read
Build a new website in a few easy steps with GitLab Pages
This tutorial shows you how to create and host your personal website using GitLab Pages with a ready-to-use template that you can customize in minutes.


A personal website is more than just a utility for digital creators and professionals in tech. It's a representation of your brand. But creating one from scratch can be time-consuming and expensive.
With GitLab Pages, you can host your website with built-in features, including SSL certificates and a GitLab-provided domain. All of this is available on GitLab's free tier, making it an efficient solution for hosting your professional presence.
We're going to take you on a fun journey to craft a stunning personal website using GitLab Pages! We’ve got a super simple, versatile template that you can easily jazz up to reflect your unique style. So grab your favorite snack, get comfy, and let’s turn your online presence into something truly fabulous!
Prerequisites
You will need the following prerequisites before getting started:
- A GitLab account (the free tier is sufficient)
- Basic familiarity with HTML/CSS
- Content and images you want to add to your website (optional)
Once you’re set up with a GitLab account and have your content handy, you can move on to the next steps.
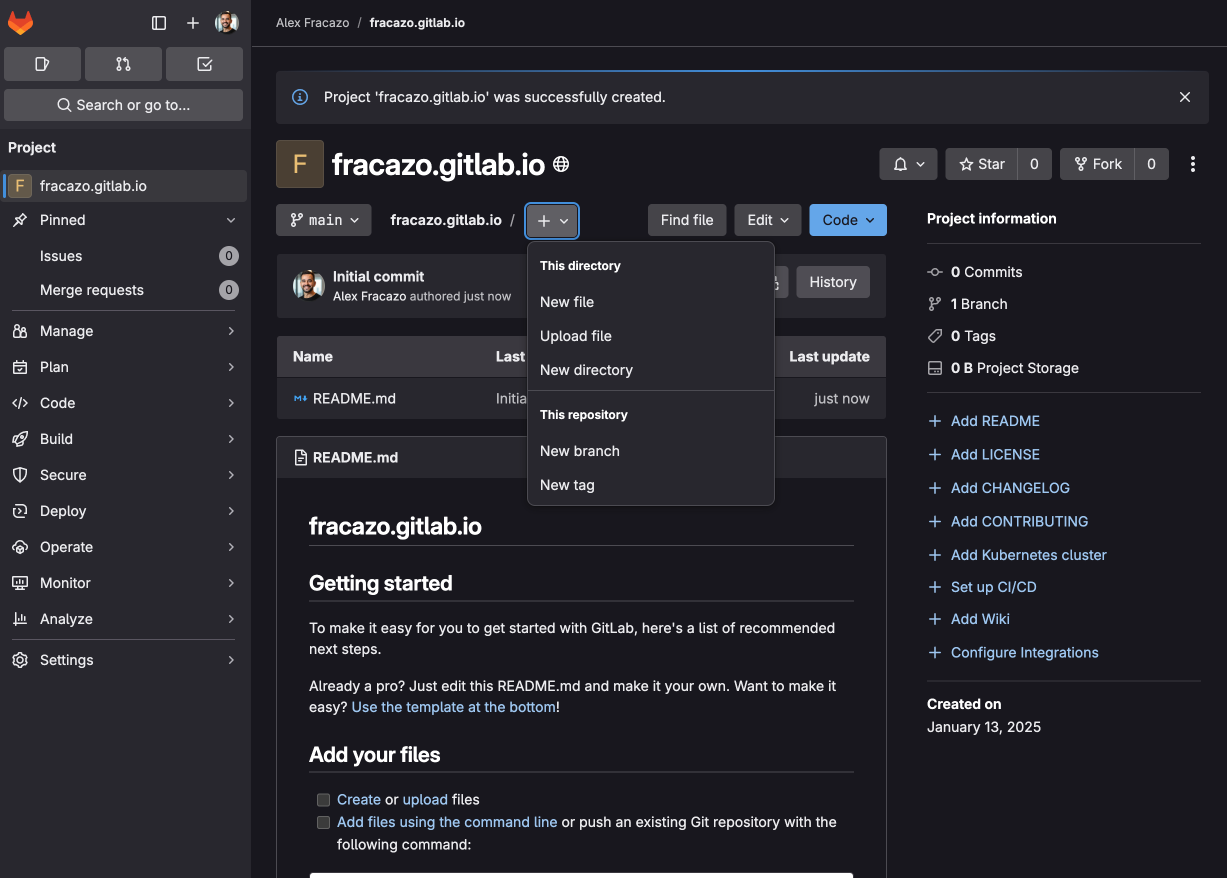
Step 1: Create a new project
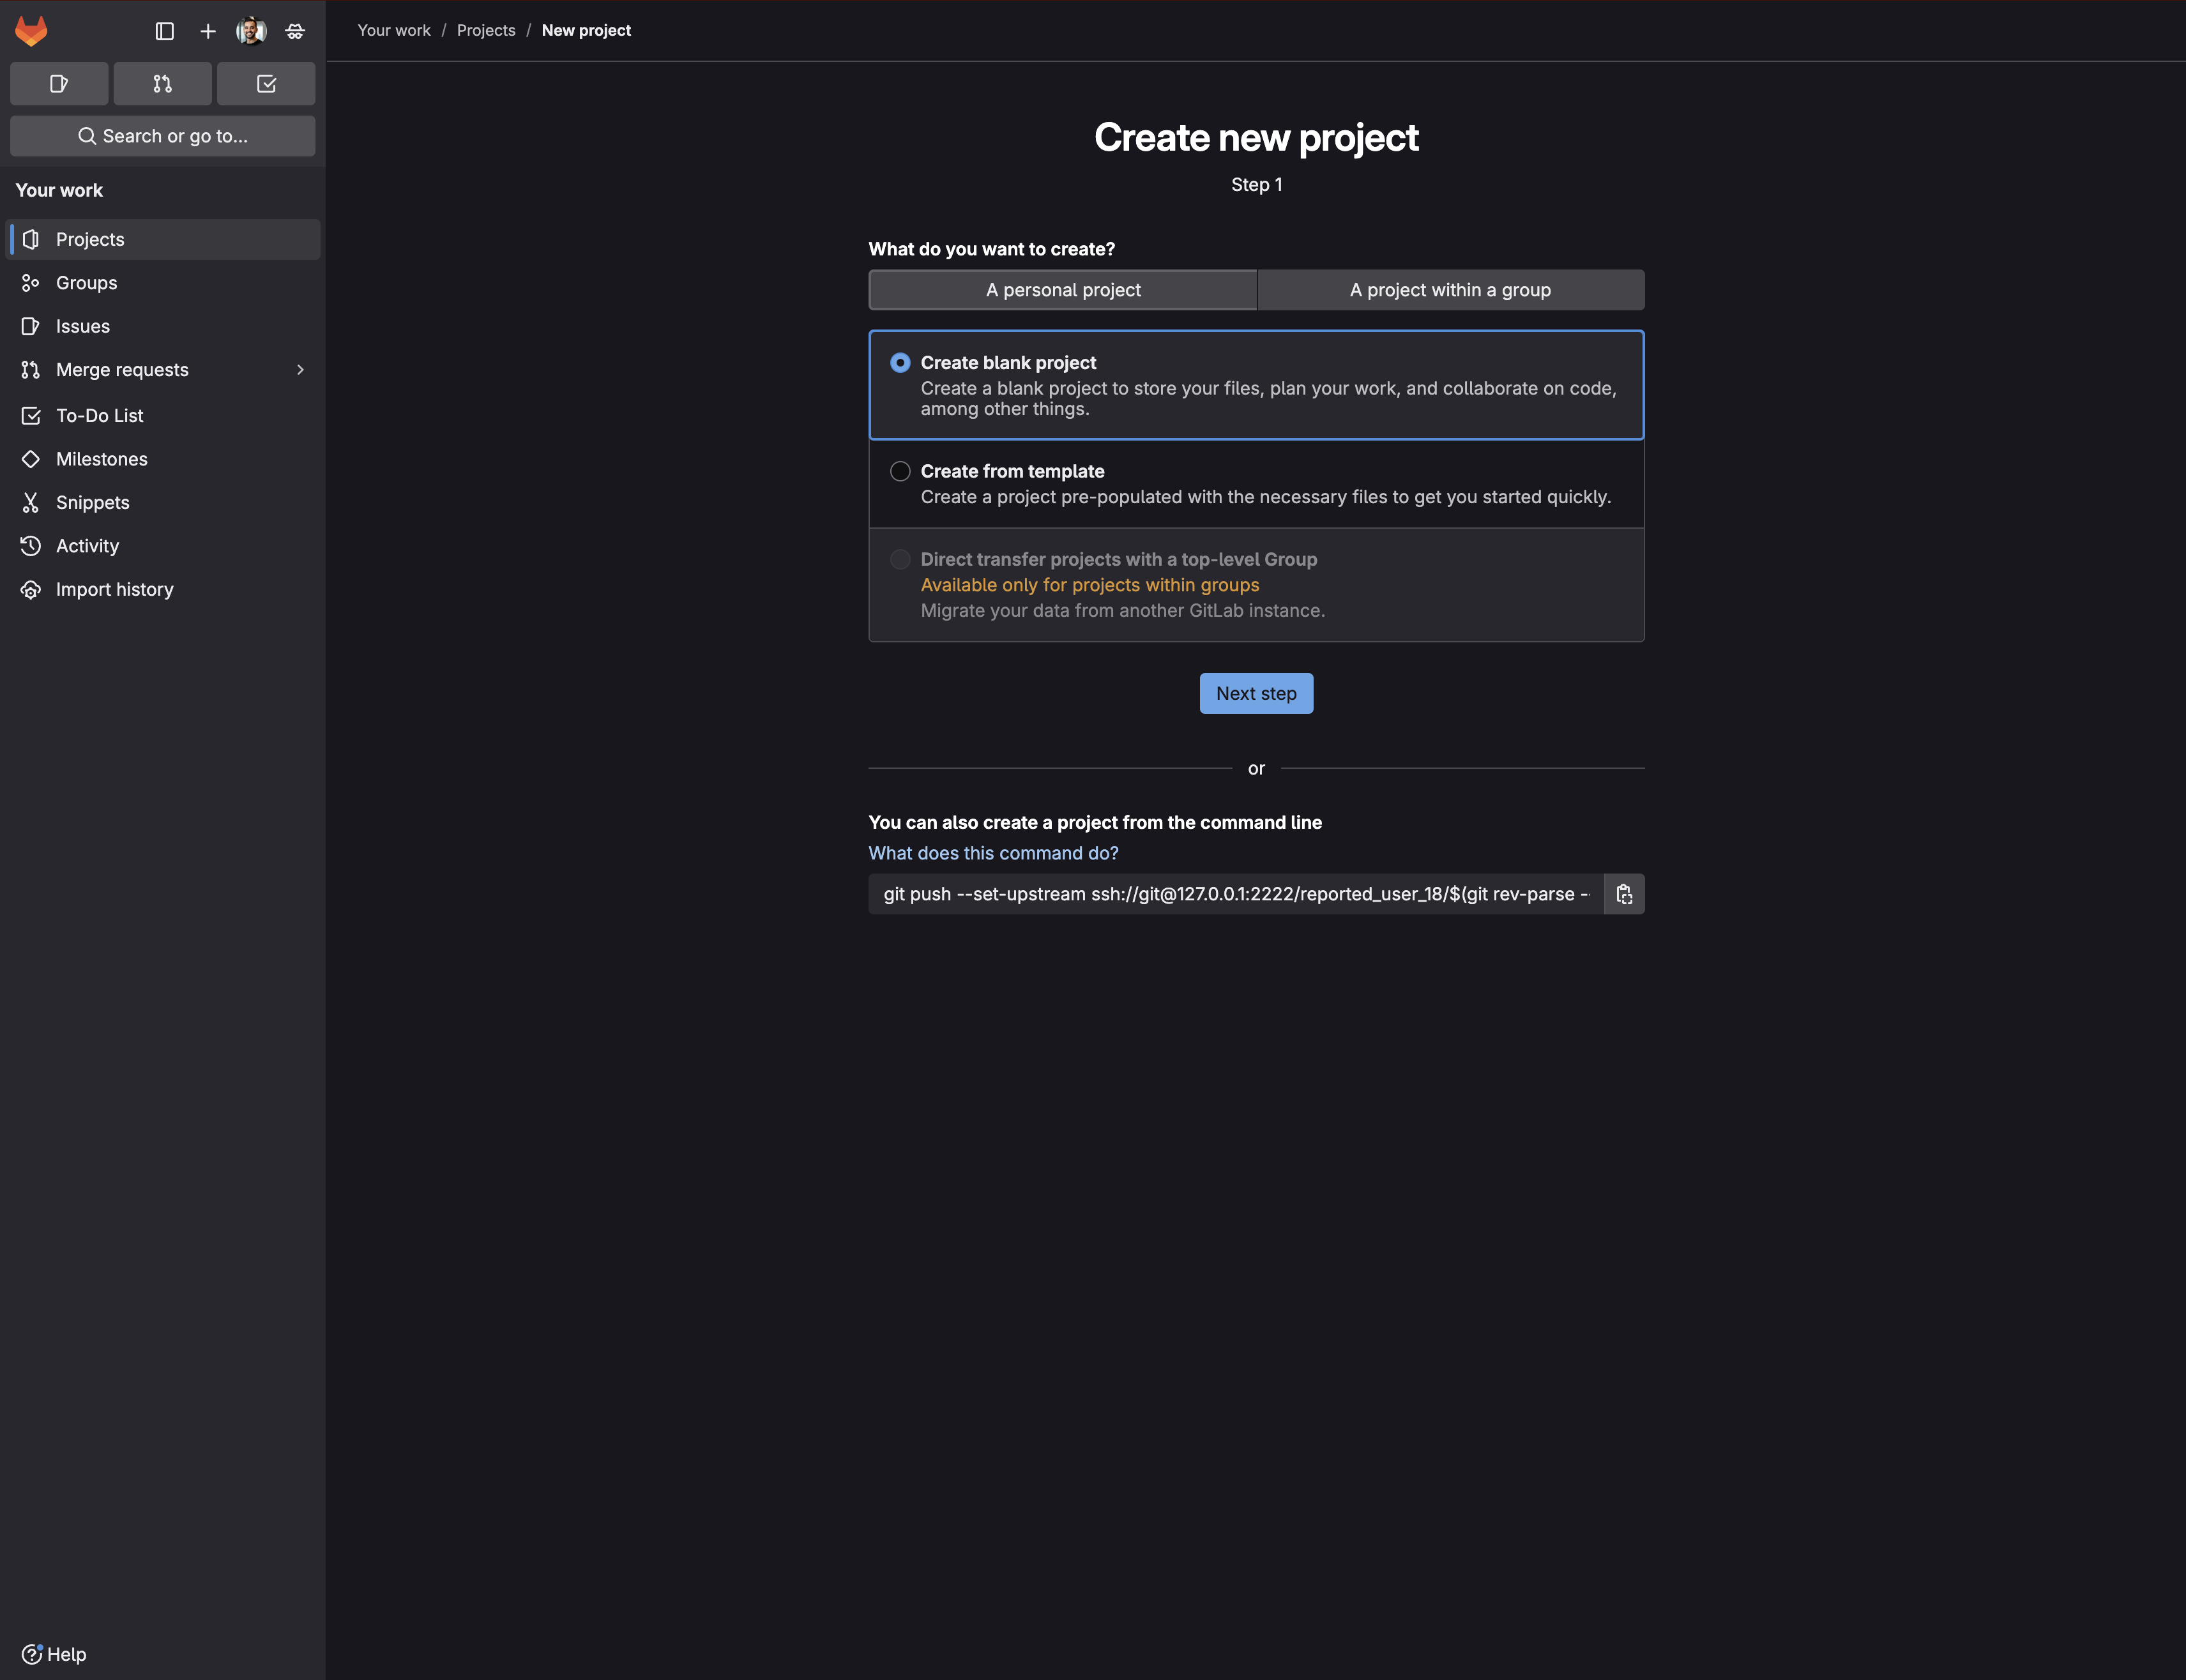
- Sign on to your GitLab account and create a project.
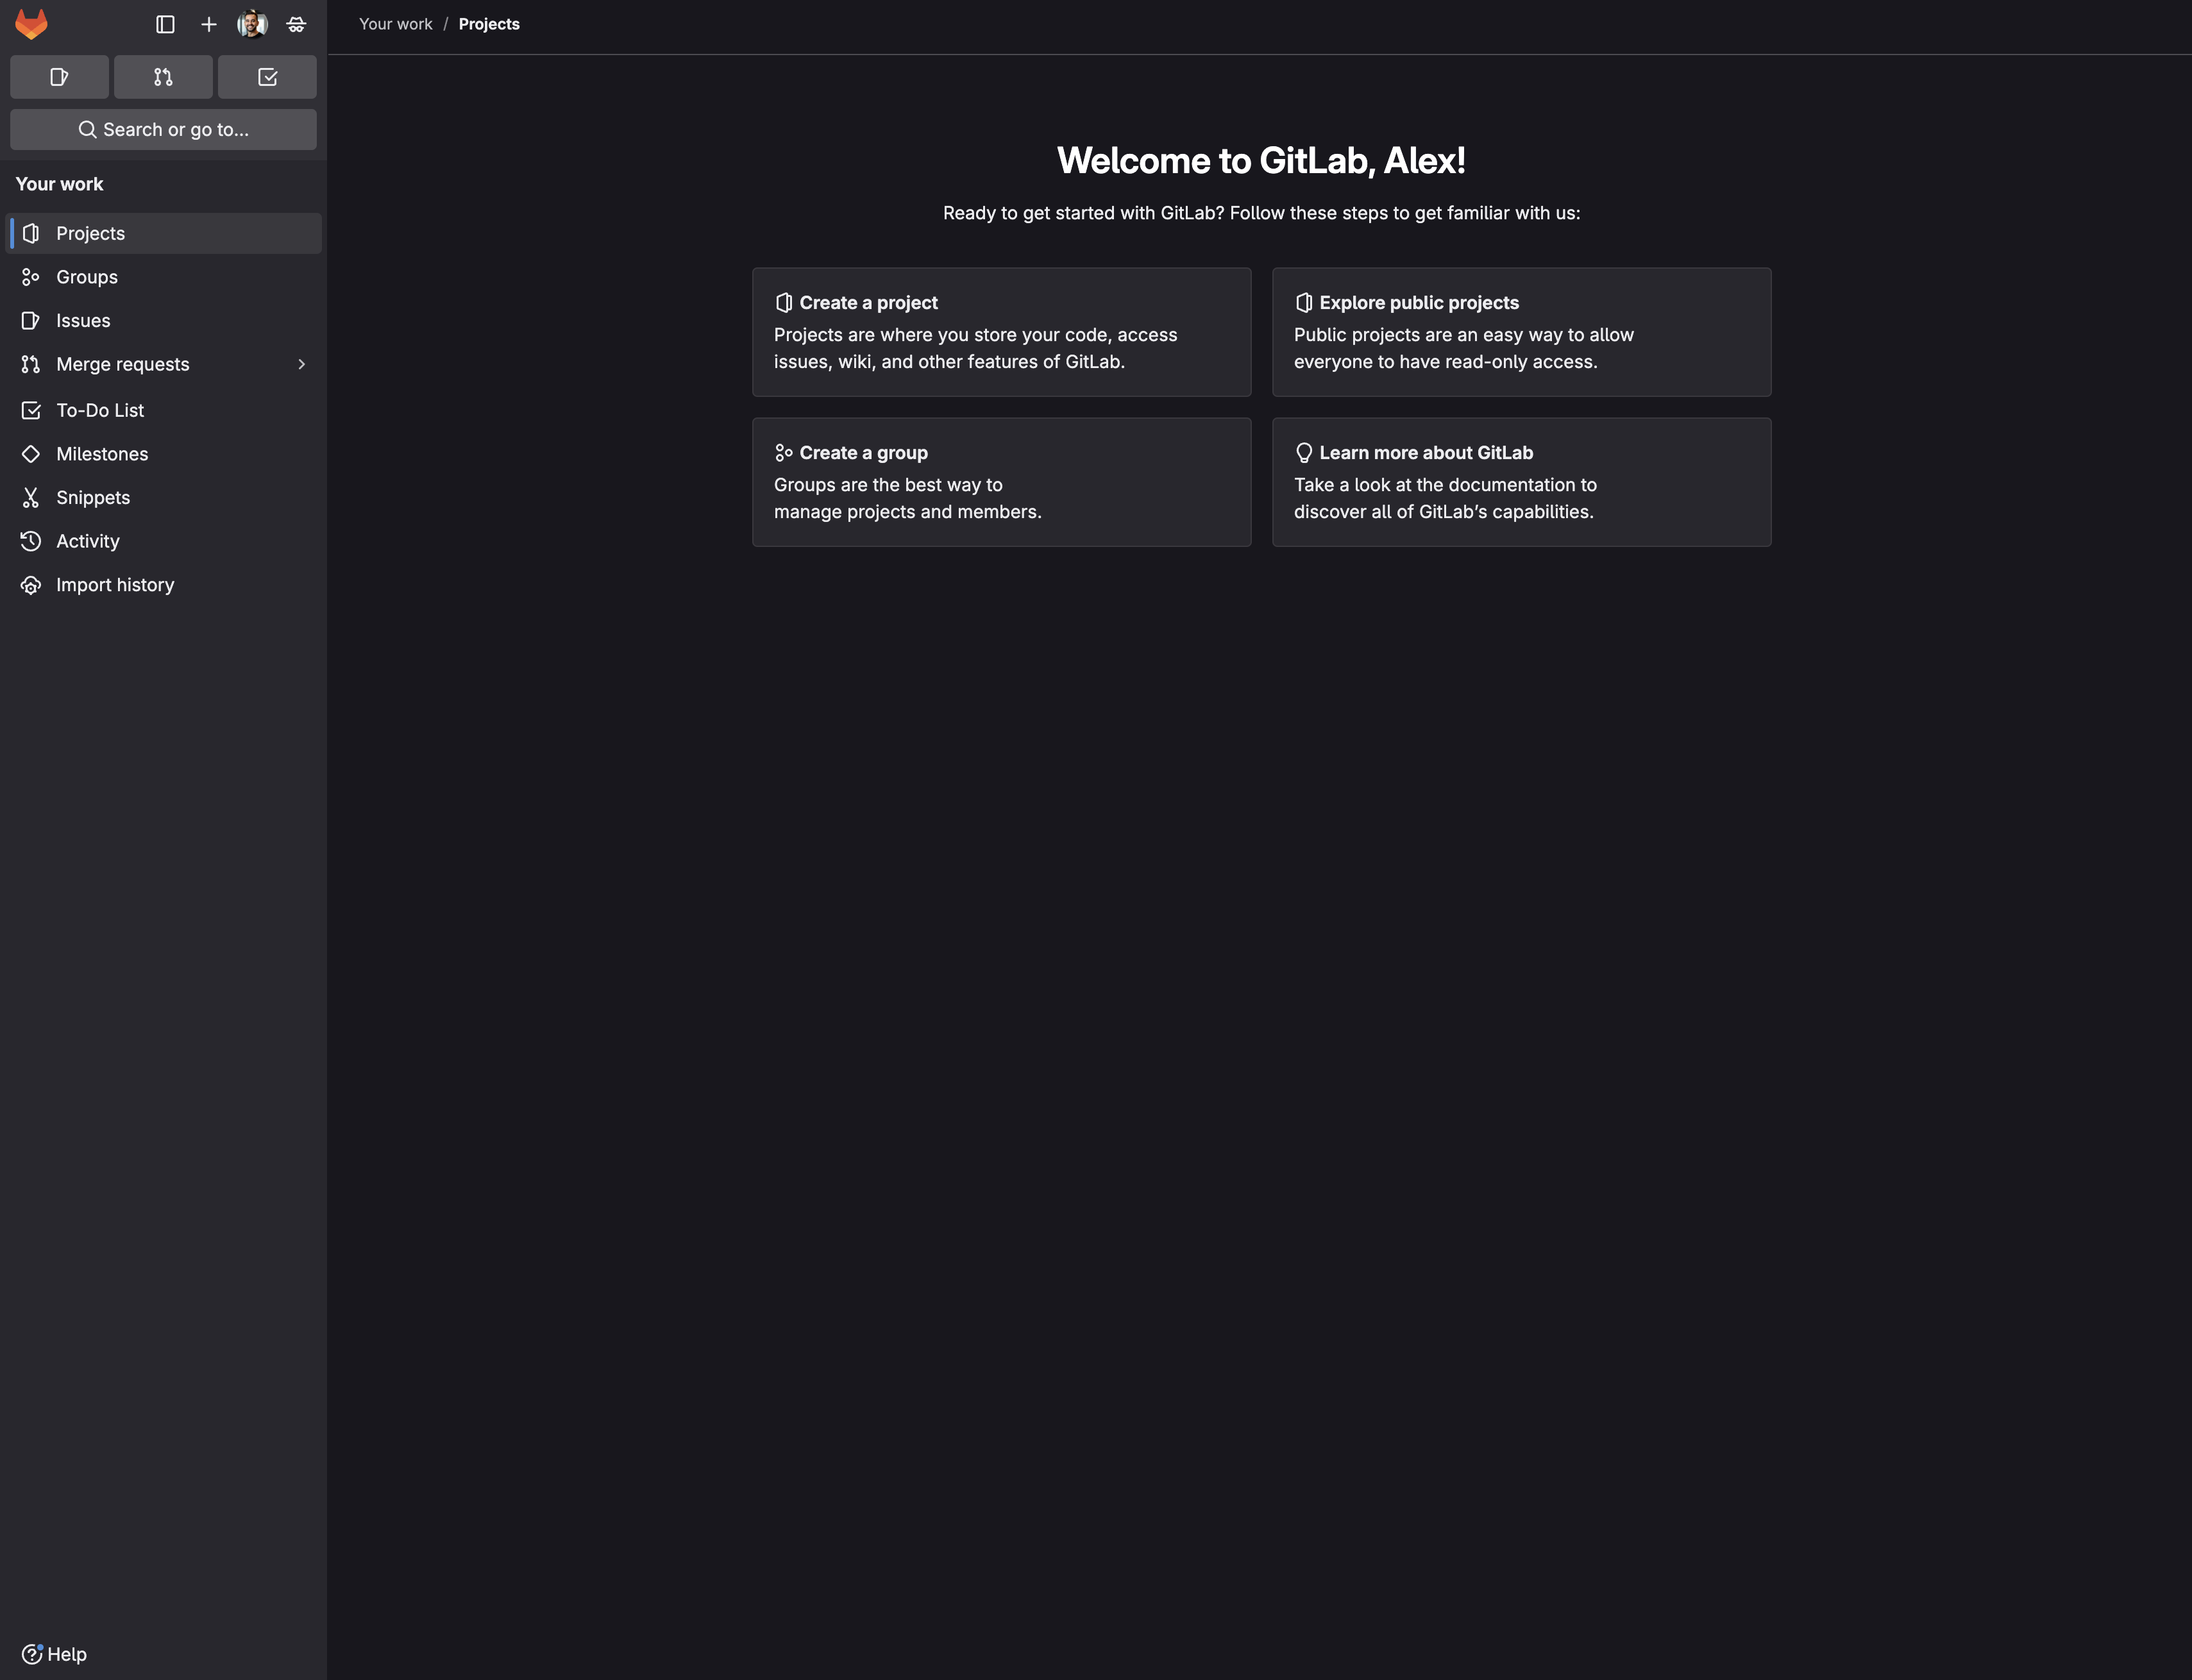
- Click Create blank project.
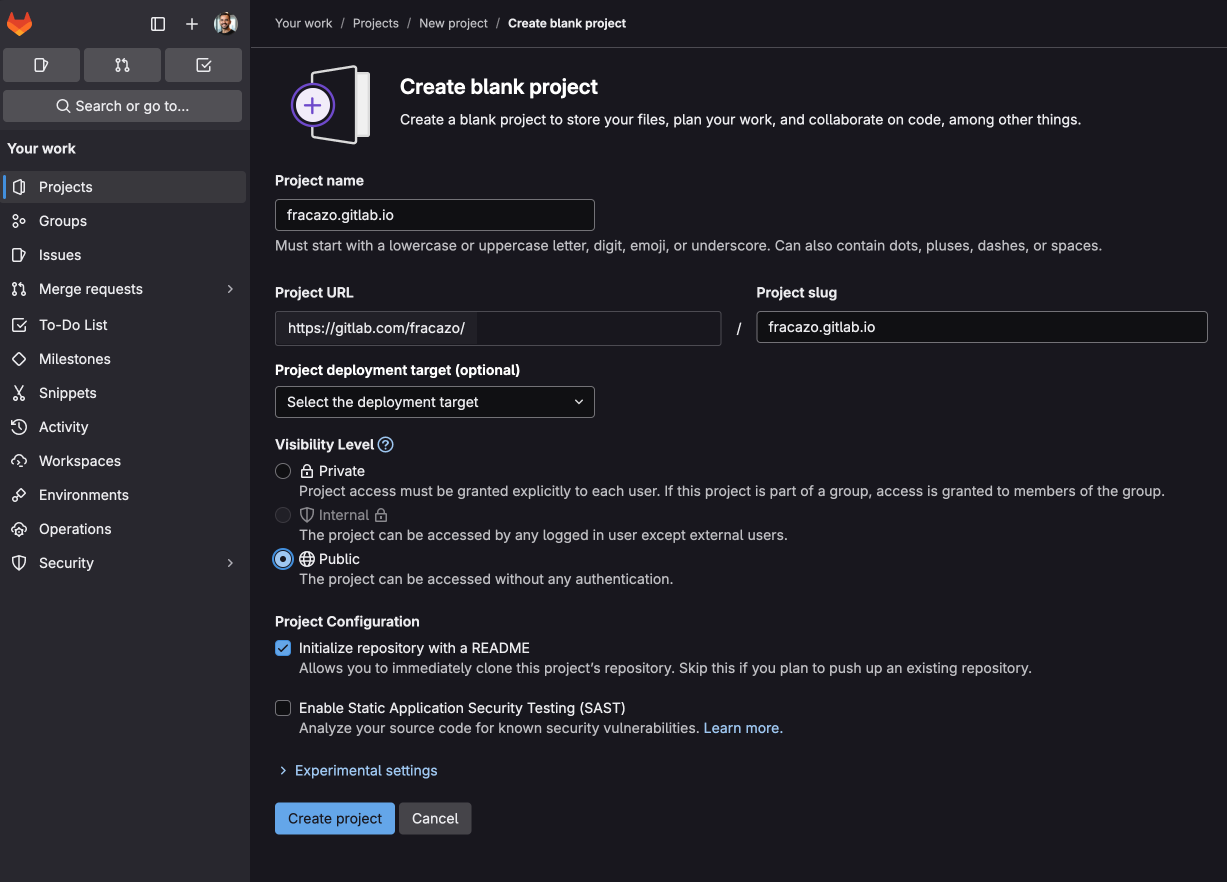
- Fill in your project details:
- Name your project
yourusername.gitlab.io. Replaceyourusernamewith your GitLab username. Tip: The project name determines your website’s URL. If you name your projectyourusername.gitlab.io, your website will be available athttps://yourusername.gitlab.iowith no additional path. However, if you use any other project name, your site will be available athttps://yourusername.gitlab.io/project-name. - Make the project public.
- Name your project
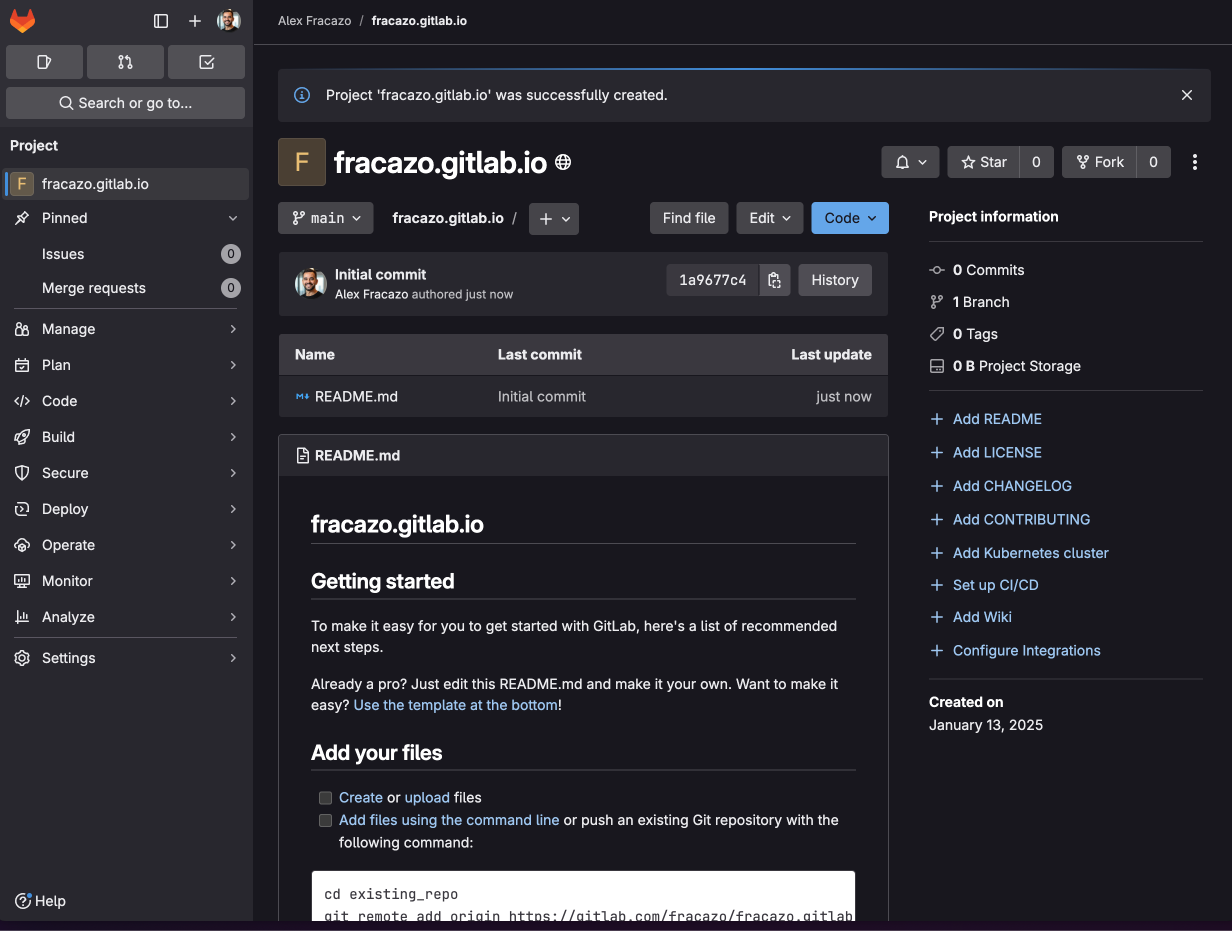
- Click Create project.
Step 2: Add the template files
Start by creating two new files in your repository:
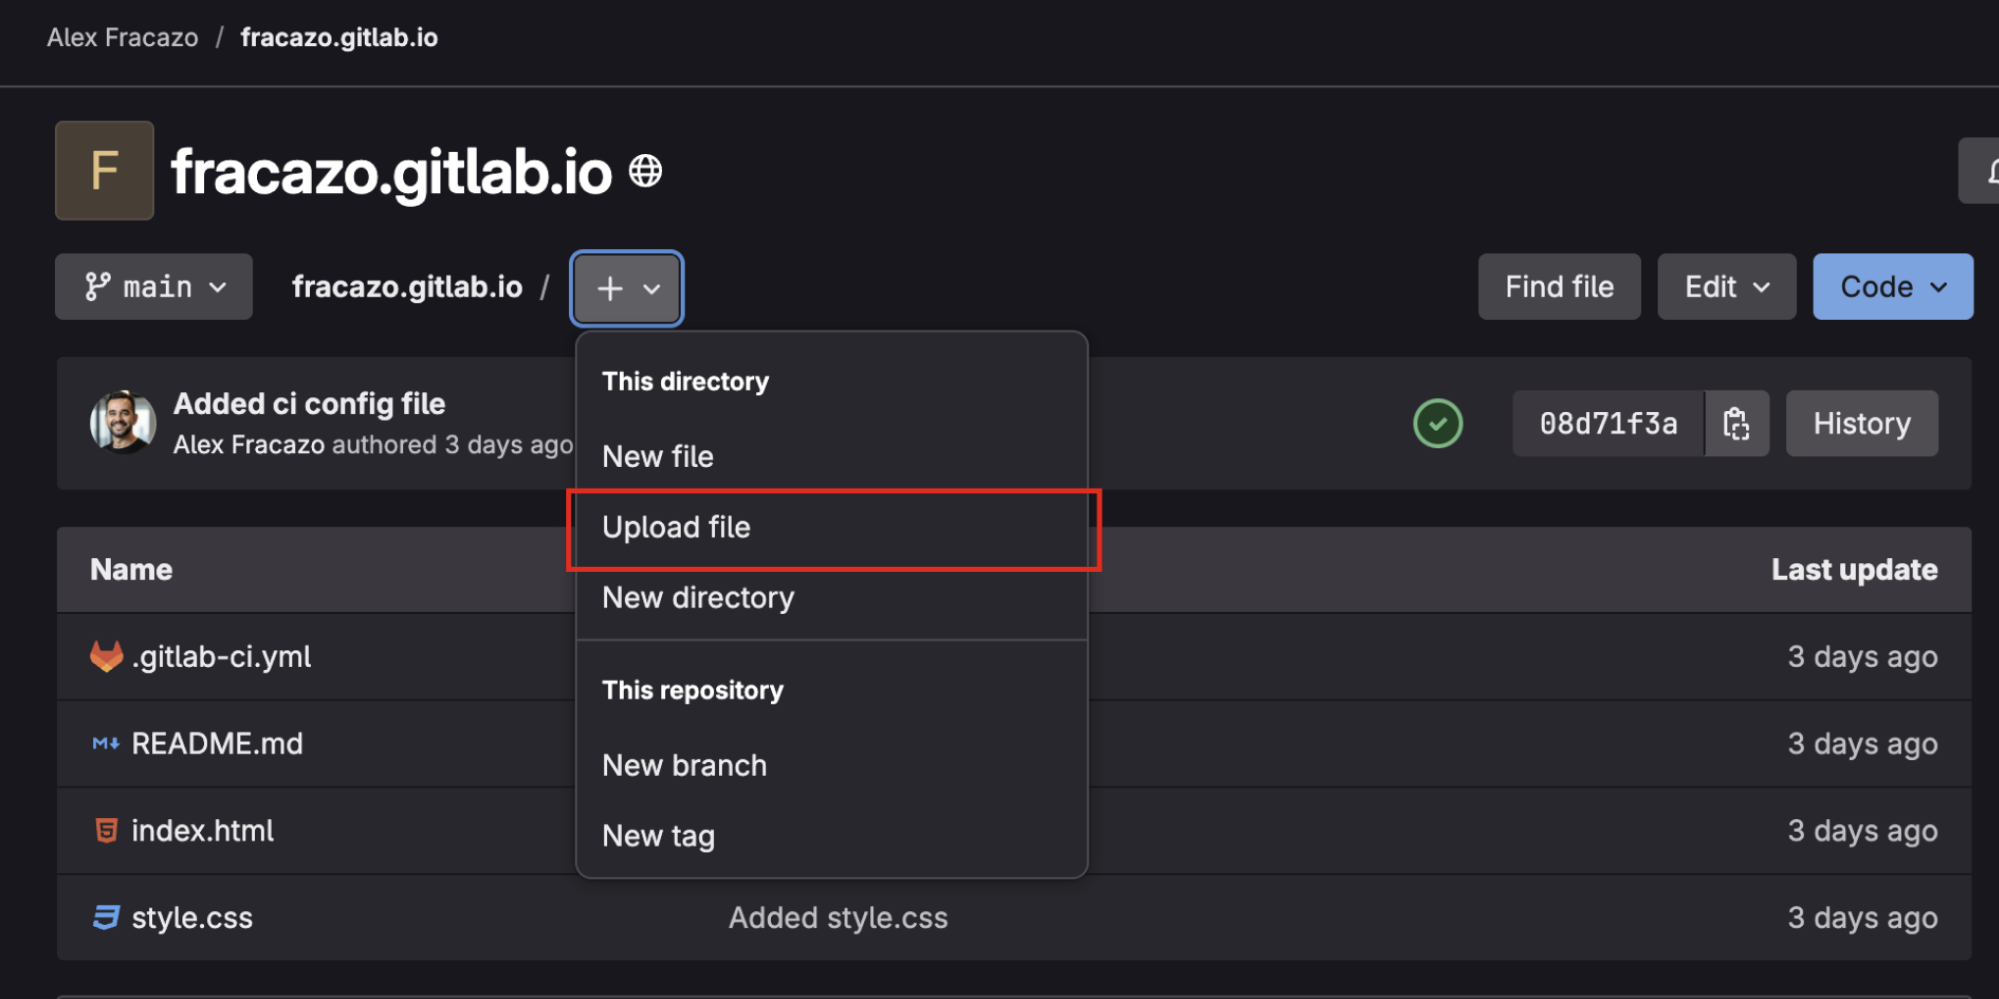
- First, create
index.html:- In your project, click the + button and select New file.
- Name the file
index.html.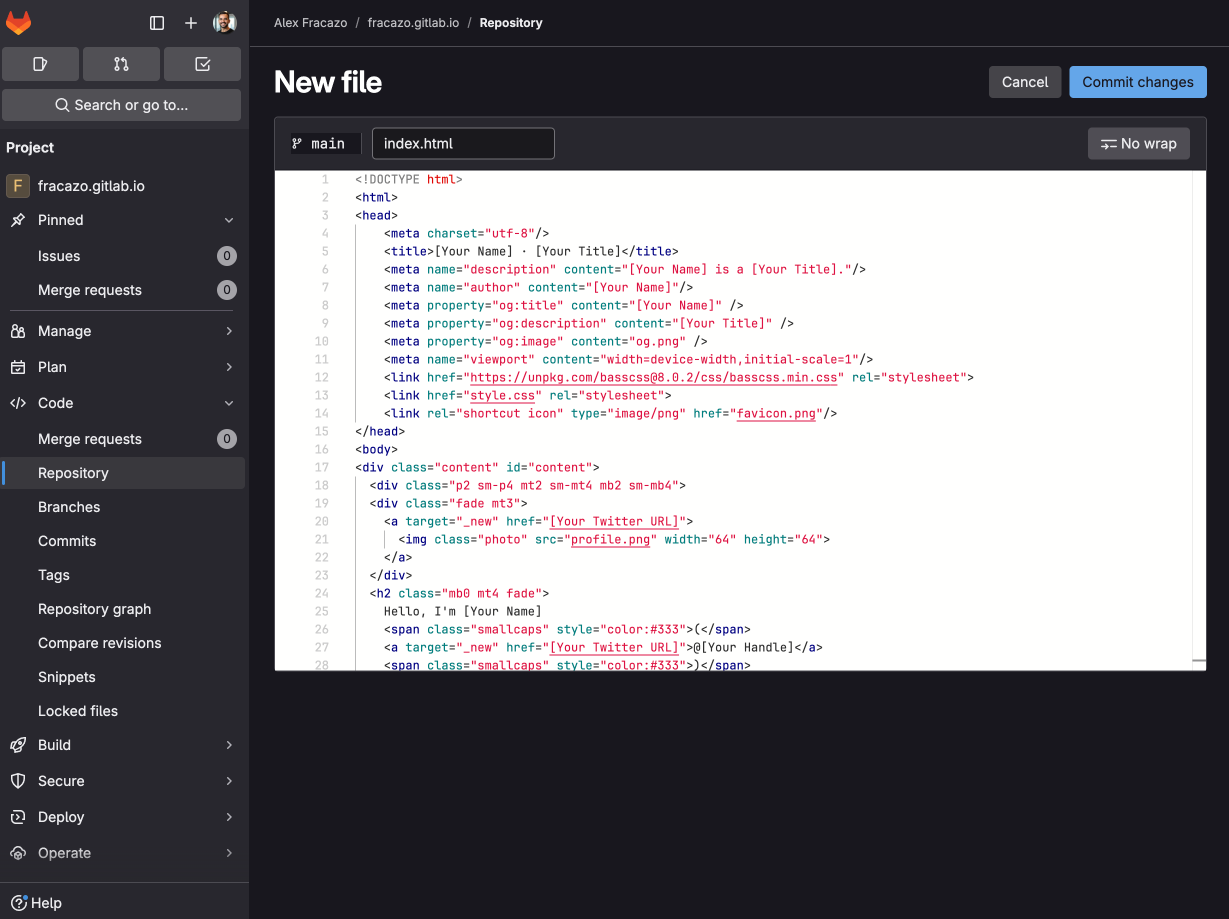
- Add your HTML content.
- Use the example HTML provided below. (Pro tip: Users can ask GitLab Duo Chat to generate HTML for enhanced functionality.)
<!DOCTYPE html>
<html>
<head>
    <meta charset="utf-8"/>
    <title>[Your Name] - [Your Title]</title>
    <meta name="description" content="[Your Name] is a [Your Title]."/>
    <meta name="author" content="[Your Name]"/>
    <meta property="og:title" content="[Your Name]" />
    <meta property="og:description" content="[Your Title]" />
    <meta property="og:image" content="og.png" />
    <meta name="viewport" content="width=device-width,initial-scale=1"/>
    <link href="https://unpkg.com/[email protected]/css/basscss.min.css" rel="stylesheet">
    <link href="style.css" rel="stylesheet">
    <link rel="shortcut icon" type="image/png" href="favicon.png"/>
</head>
<body>
<div class="content" id="content">
  <div class="p2 sm-p4 mt2 sm-mt4 mb2 sm-mb4">
  <div class="fade mt3">
    <a target="_new" href="[Your Linkedin URL]">
      <img class="photo" src="profile.png" width="64" height="64">
    </a>
  </div>
  <h2 class="mb0 mt4 fade">
    Hello, I'm [Your Name]
    <span class="smallcaps">(</span>
    <a target="_new" href="[Your Linkedin URL]">@[Your Handle]</a>
    <span class="smallcaps">)</span>
  </h2>
  <h2 class="mt0 mb4 fade gray">
    I'm a [Your Title]
  </h2>
  <p class="mb4 fade">
    I'm a [Your Role] at [Your Company], [Brief company description].
  </p>
  <div class="fade">
    <p class="fade mb4">
      Your personal statement about what you do and what you're interested in. Add your contact preferences here.
    </p>
  </div>
  <p class="fade mb4">
    <span class="gray">—</span>
    [Your Name]
    <span class="smallcaps>(</span>
    <a target="_new" href="[Your Linkedin URL]">@[Your Handle]</a>
    <span class="smallcaps">)</span>
  </p>
  </div>
</div>
</body>
</html>
- Add a commit message (e.g., "Added index.html").
- Click Commit changes.
- Create
style.css(follow same steps above).
body {
  margin: 0;
  padding: 0;
  background: #000;
  color: #f4f4f4;
  font-family: "Graphik Web", system-ui, -apple-system, BlinkMacSystemFont, "Helvetica Neue", "Helvetica", "Segoe UI", Roboto, Ubuntu, sans-serif;
  font-weight: 400;
  font-smooth: antialiased;
  -webkit-font-smoothing: antialiased;
  -moz-osx-font-smoothing: grayscale;
}

a {
  color: #ff310a;
  text-decoration: none;
}

a:hover {
  color: #CFEF54
}

.content {
  max-width: 40rem;
  margin: 0 auto;
}

img.photo {
  border-radius: 50%;
}

p {
  font-size: 1.5rem;
  line-height: 1.4;
  margin: 0;
  letter-spacing: -0.05rem;
}

h2 {
  font-weight: 400;
  line-height: 1.3;
  letter-spacing: -0.05rem;
}

.smallcaps {
  font-variant: small-caps;
  color:#333;
}

.gray{
  color: #999;
}

.preloader {
  display: flex;
  justify-content: center;
  align-items: center;
  height: 100vh;
  height: -moz-available;
  height: -webkit-fill-available;
  height: fill-available;
  width: 100%;
  background: #000;
  position: fixed;
  top: 0;
  left: 0;
  z-index: 9999;
  transition: opacity 0.3s linear;
  transform: translate3d(0, 0, 0);
}

body.loaded .preloader {
  opacity: 0;
}

.fade {
  animation: fadeIn 1s ease-in-out both;
}

.fade:nth-child(2) {
	animation-delay: 1s;
}

.fade:nth-child(3) {
	animation-delay: 2s;
}

.fade:nth-child(4) {
	animation-delay: 3s;
}

.fade:nth-child(5) {
	animation-delay: 4s;
}

.fade:nth-child(6) {
	animation-delay: 5s;
}

.fade:nth-child(7) {
	animation-delay: 6s;
}

.fade:nth-child(8) {
	animation-delay: 7s;
}

.fade:nth-child(9) {
	animation-delay: 8s;
}

.fade:nth-child(10) {
	animation-delay: 9s;
}

.fade:nth-child(11) {
	animation-delay: 10s;
}

.fade:nth-child(12) {
	animation-delay: 11s;
}

.fade:nth-child(13) {
	animation-delay: 12s;
}

@keyframes fadeIn {
	from {
		opacity: 0;
		transform: translate3d(0, 0%, 0);
	}
	to {
		opacity: 1;
		transform: translate3d(0, 0, 0);
	}
}
Step 3: Configure GitLab CI file
There are two ways to create the GitLab CI configuration file that tells GitLab how to build and deploy your site:
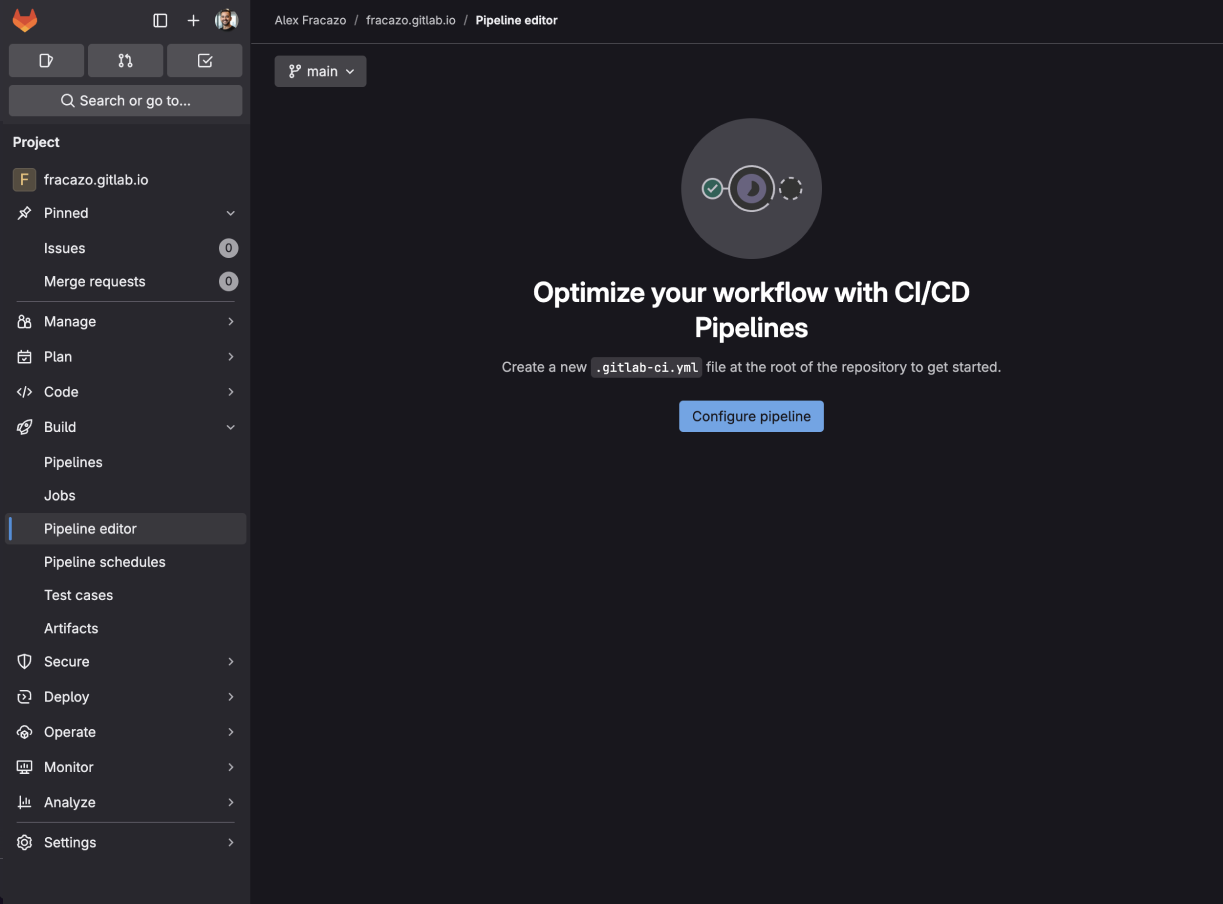
Option 1: Use Pipeline Editor (recommended)
- Go to your project's Build > Pipeline Editor.
- The
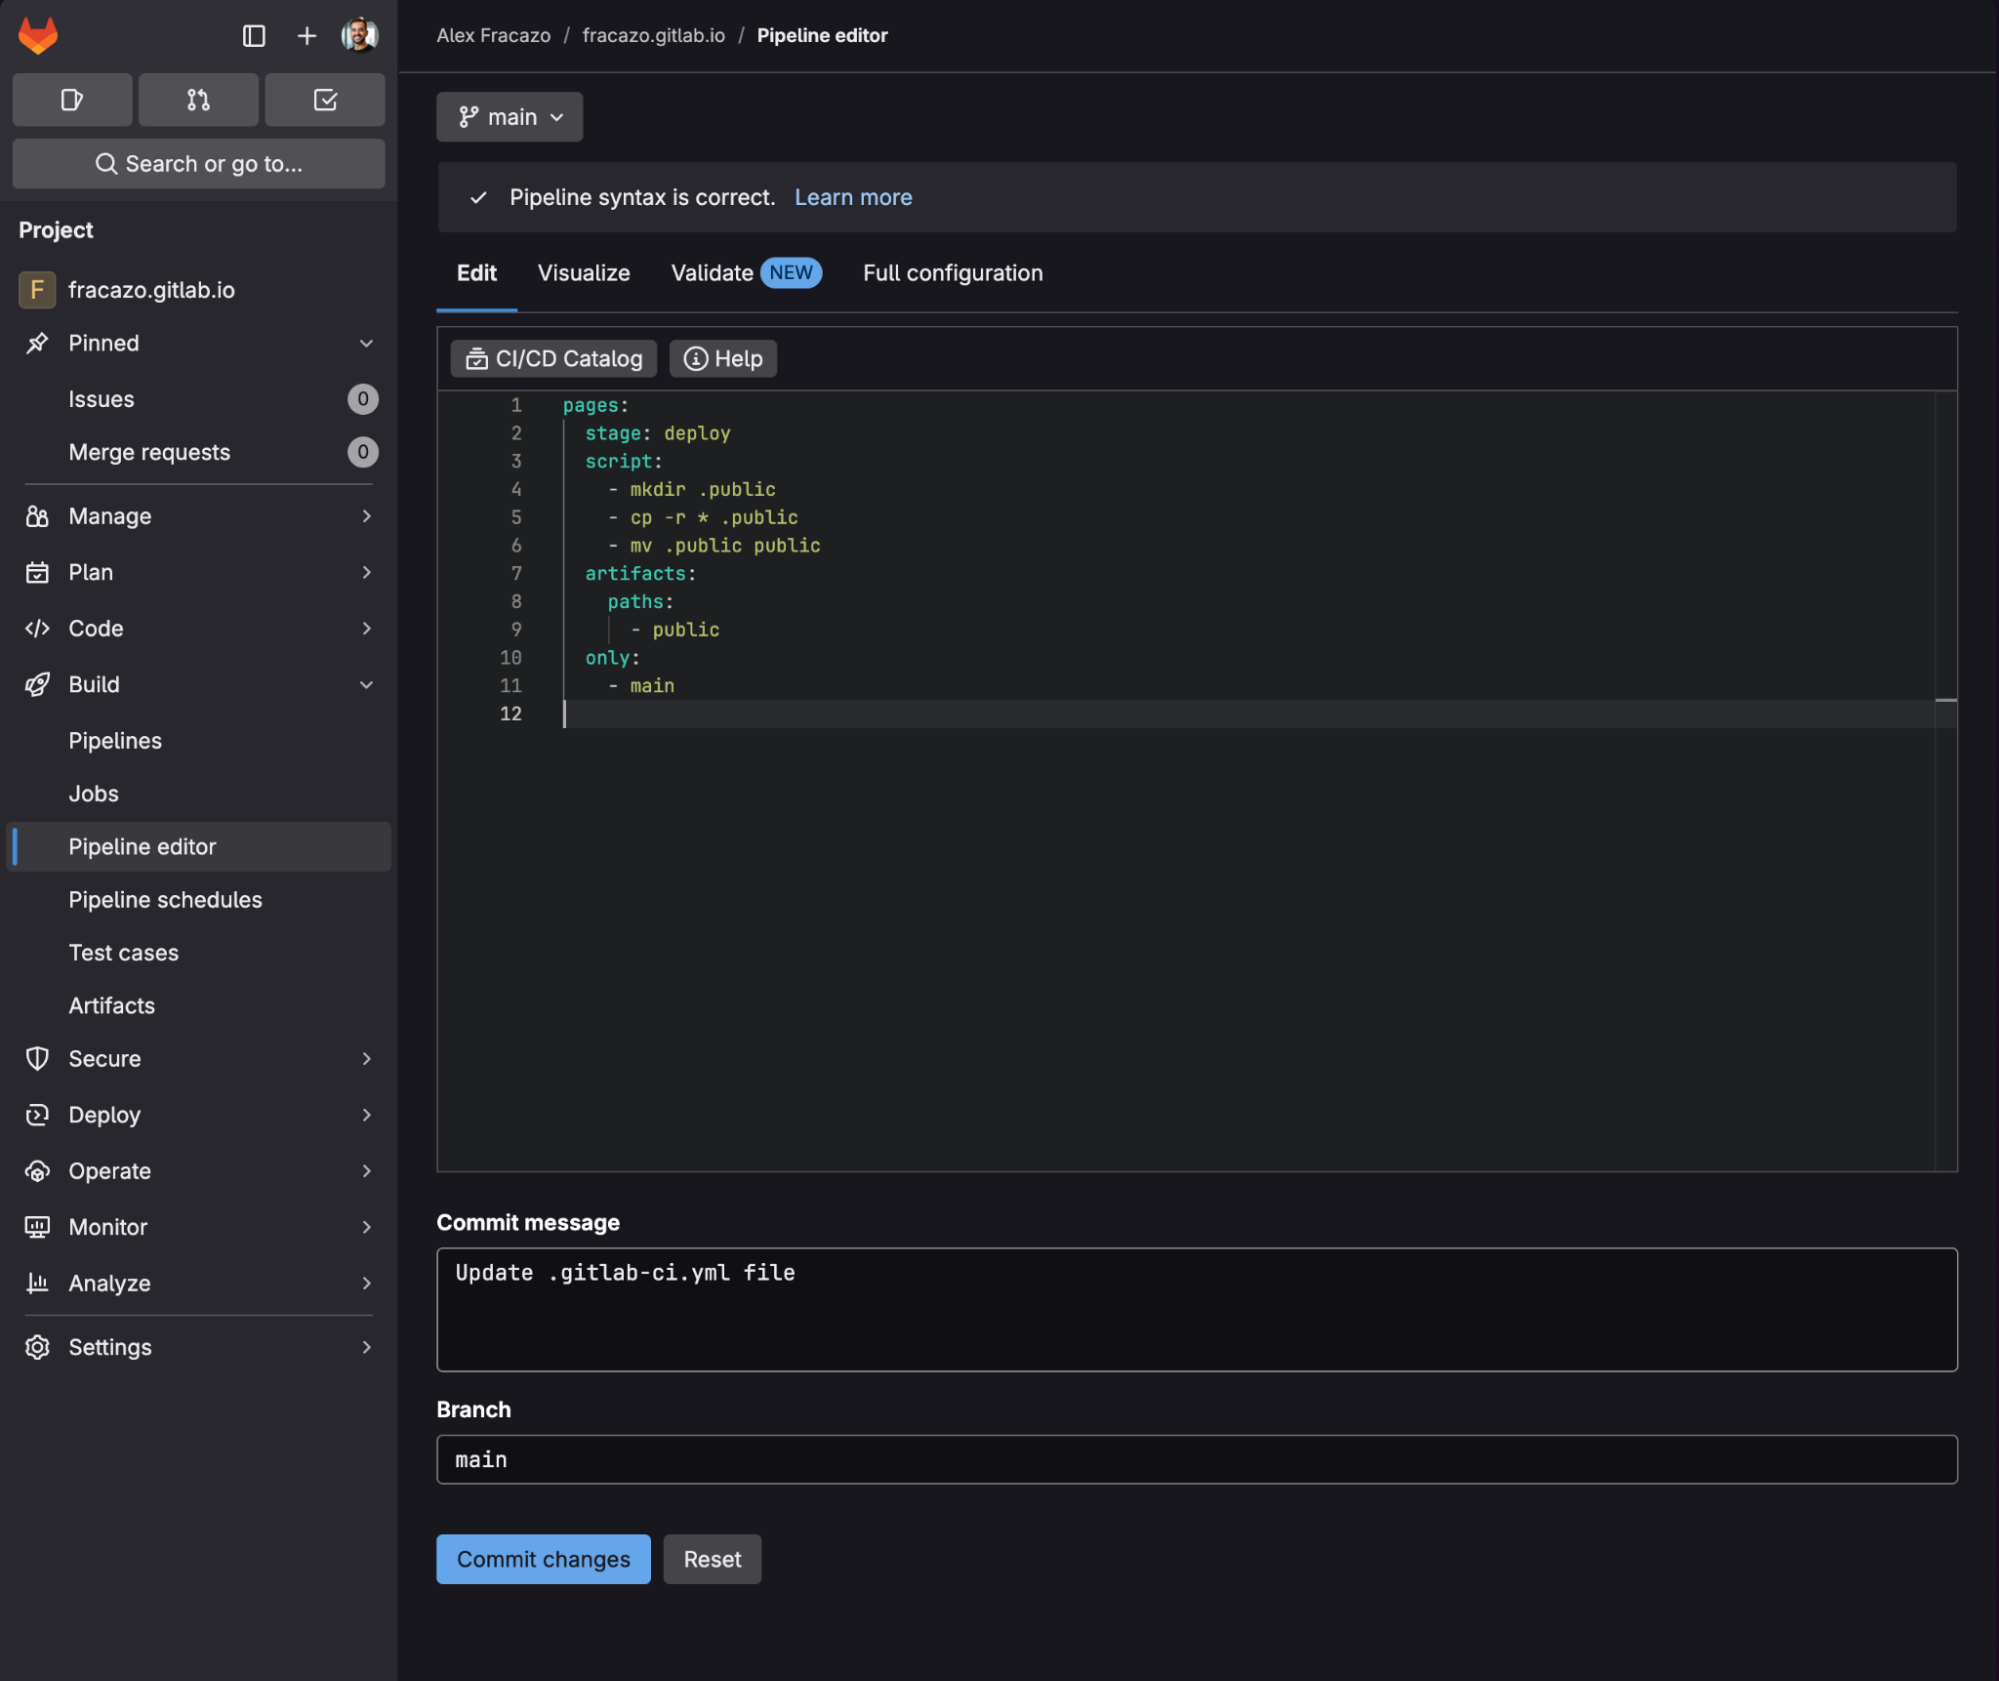
.gitlab-ci.ymlfile will be automatically created. - Copy and paste the following configuration:
pages:
  stage: deploy
  script:
    - mkdir .public
    - cp -r * .public
    - mv .public public
  artifacts:
    paths:
      - public
  only:
    - main
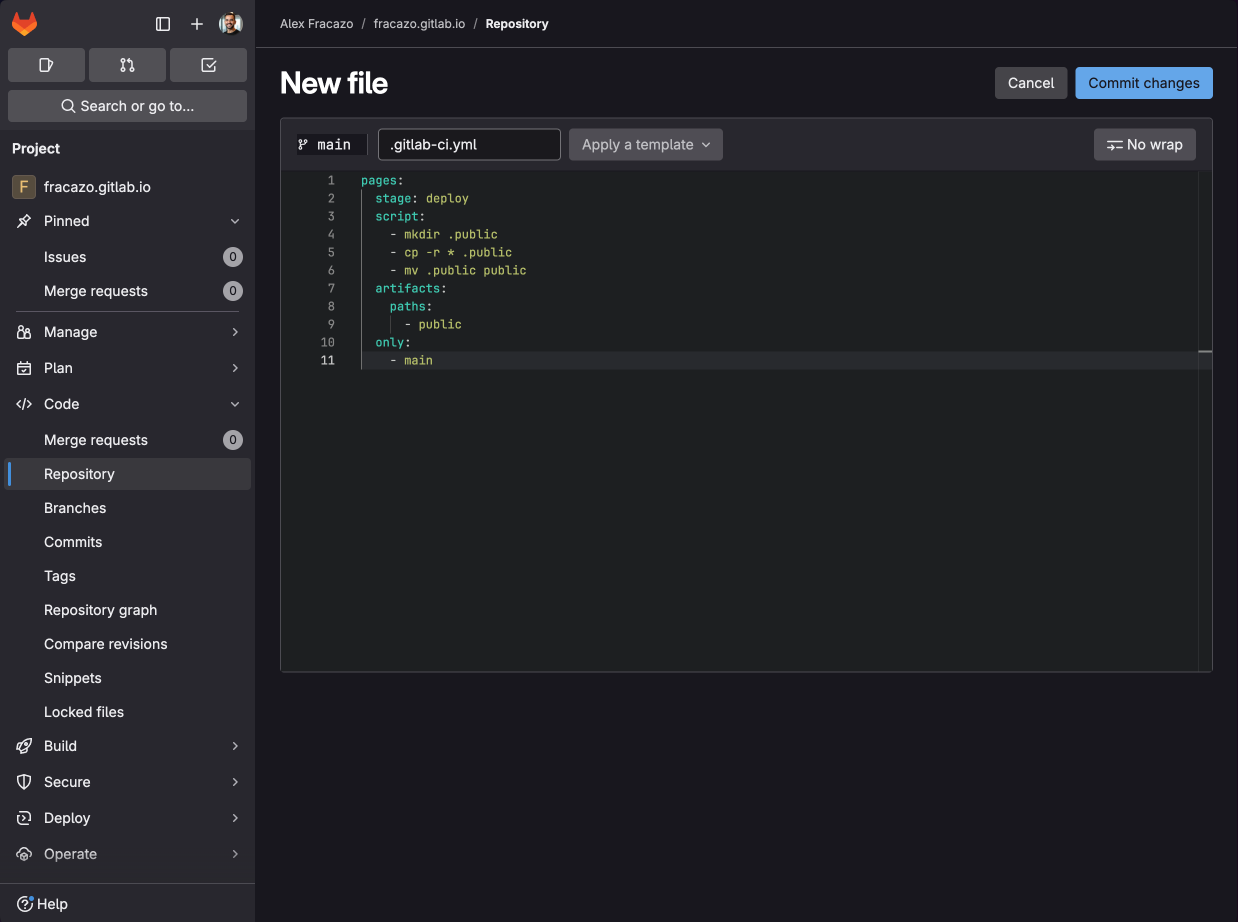
Option 2: Manual creation
If you prefer to create the file manually:
- Create a new file named
.gitlab-ci.yml. - Add the following configuration:
pages:
  stage: deploy
  script:
    - mkdir .public
    - cp -r * .public
    - mv .public public
  artifacts:
    paths:
      - public
  only:
    - main
The key to getting your site running is the GitLab CI configuration file. This file tells GitLab how to build and deploy your site.
Let's break down what each part does:
The script part
script:
  - mkdir .public
  - cp -r * .public
  - mv .public public
This creates a folder called public and copies all your website files into it. GitLab Pages uses this folder to serve your website by default, though you can customize the publishing folder if needed.
The only part
only:
  - main
This tells GitLab to only update your website when changes are made to the main branch. This helps prevent accidental updates from experimental changes.
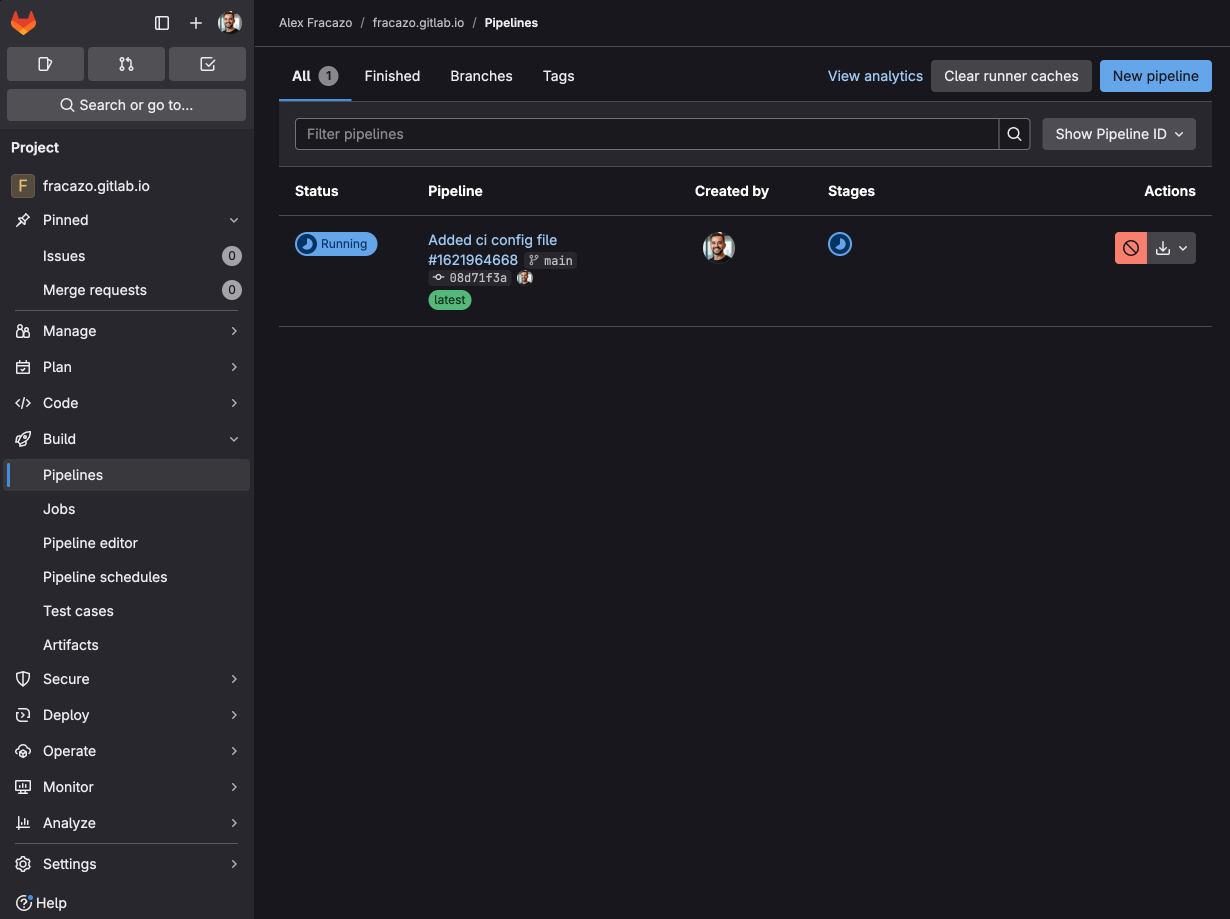
Step 4: Watch the magic happen
- Commit all your changes.
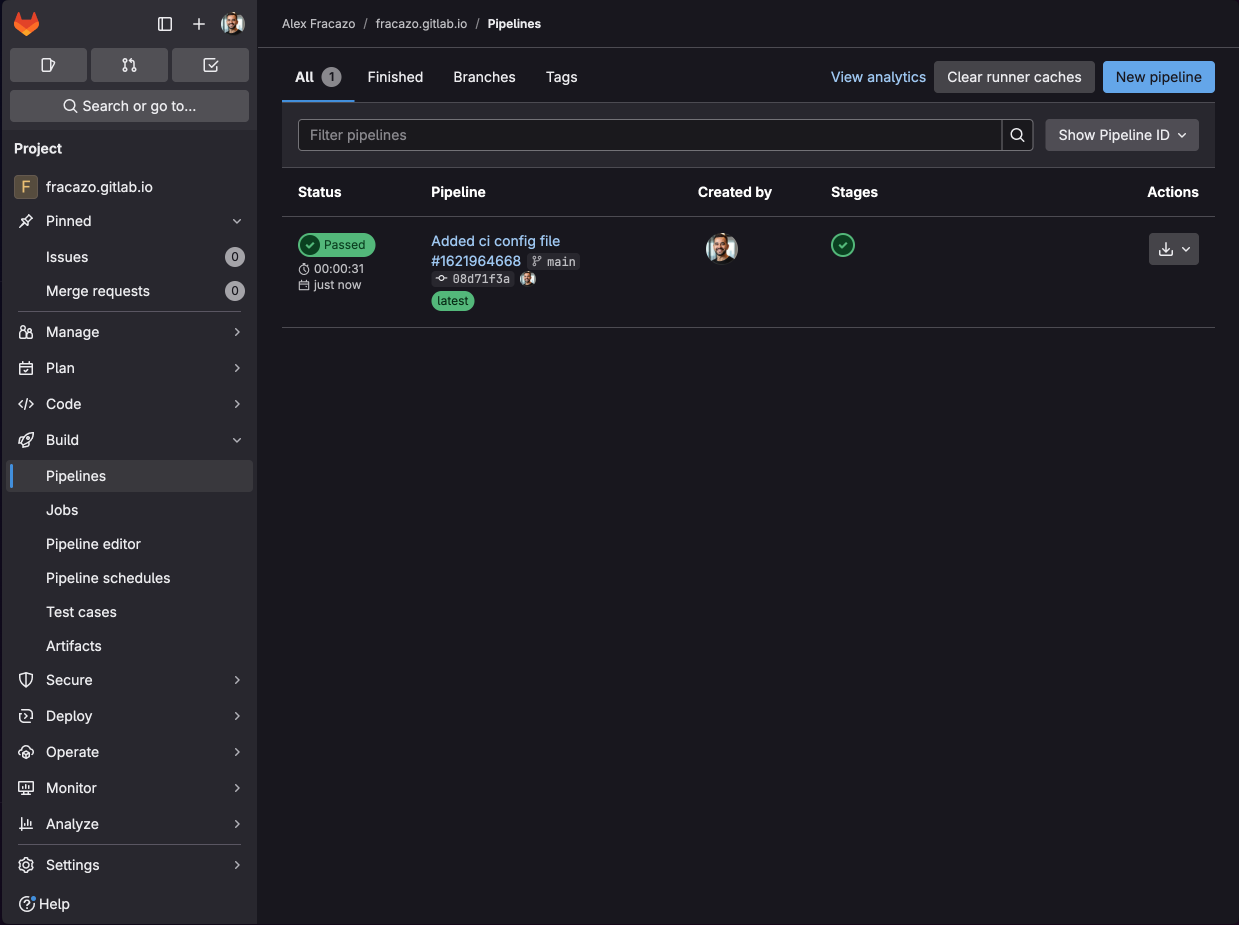
- Go to Build > Pipelines to watch your deployment.
- Wait for the pipeline to complete successfully (indicated by a green checkmark).
Step 5: Access your website
Once the pipeline completes successfully, your website will be available at: https://[yourusername].gitlab.io/ .
You can find an overview of your deployed website and additional settings in your project's Deploy > Pages section. Here you'll find useful information. including:
- Your website's access URLs
- Domain settings
- By default GitLab enables Unique domain. Make sure to disable it if you want to use the GitLab-provided domain. Learn more with the unique domain documentation.
- HTTPS certificates status
- Recent deployments
- Additional configuration options
- Custom domains
This section is particularly helpful when setting up custom domains or troubleshooting deployment issues.
Customize your site
- Replace all “Your ...” placeholders in
index.htmlwith your information.
- Add your images:
- profile.png - your profile photo (64x64px)
- favicon.png - your site favicon (32x32px)
- Og.png - OpenGraph image for social media preview (1200x630px)
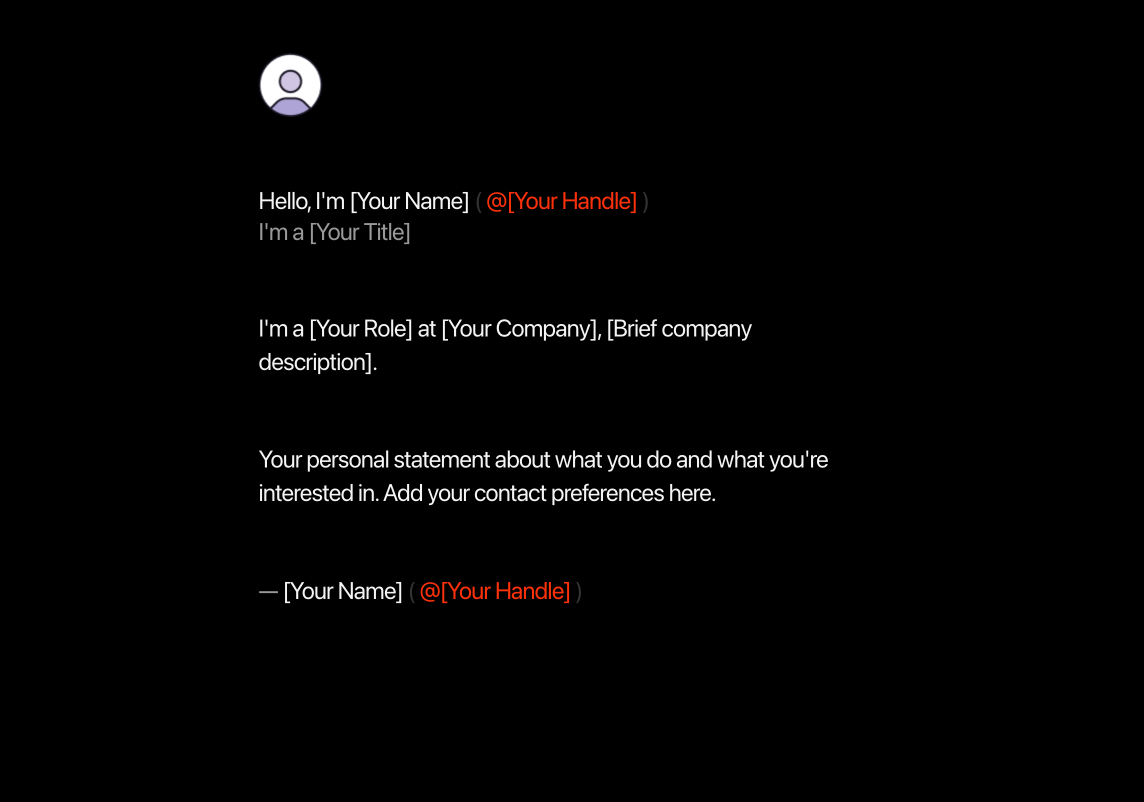
See it in action
If you're familiar with GitLab, feel free to fork my repository to get started quickly.
Here is the final result: https://fracazo.gitlab.io/
Common issues and solutions
- By default, GitLab enables "Unique domain" for Pages projects. To use the simpler GitLab-provided domain (like
username.gitlab.io), go to Deploy > Pages and disable the "Use unique domain" option. While unique domains offer some technical advantages, like better asset path handling, you might prefer the cleaner URL structure for a personal website. - If your pipeline fails, check that you're using
maininstead ofmasterin your.gitlab-ci.ymlfile. - Ensure your group and project is public for GitLab Pages to work.
- If any jobs fail in your pipeline, you can check the job log for detailed error messages to help with troubleshooting.
With GitLab Pages and this template, you can have a professional/personal website up and running in minutes. The template is clean, responsive, and easy to customize. As you grow professionally, you can easily update your site directly through GitLab.
You can automate the deployment process by leveraging GitLab's CI/CD capabilities and focusing on creating great content.
The best part? All of this is available on GitLab's free tier, making it an excellent option for free hosting of your personal projects, documentation sites, or even small business websites. For more advanced features and configurations, check out our Pages documentation.
What’s next for GitLab Pages?
We're constantly working to make GitLab Pages even better for creators and developers. Here are some exciting improvements coming soon:
Simplified domain management
We have some exciting updates coming to GitLab Pages that will make managing your domains even easier and more fun! You can look forward to a streamlined dashboard that brings all your domain settings together in one friendly space, making everything easily accessible.
You’ll stay informed with real-time updates on your DNS and SSL certificate statuses, helping you keep your domains secure and running smoothly.
Custom domain setup
Setting up custom domains will be a breeze with our easy-to-follow process, guiding you every step of the way. Plus, you'll be able to set up your custom domains to automatically redirect visitors from your old website address to your new one – perfect for when you want all your traffic to go to one main website. Learn more about custom domains.
Get started with GitLab Pages today with GitLab's free tier!